Instructions for use of Kesimpta®Sensoready® Pen
It is important that you understand and follow these instructions for use before injecting Kesimpta. Talk to your doctor, pharmacist or nurse if you have any questions before you use Kesimpta for the first time.
REMEMBER:
- Do not use the pen if either the seal on the outer carton or the seal on the pen is broken. Keep the pen in the sealed outer carton until you are ready to use it.
- Do not shake the pen.
- If you drop your pen, do not use it if the pen looks damaged, or if you dropped it with the cap removed.
- Dispose of the used pen immediately after use. Do not re-use a pen. See “How should I dispose of the used Kesimpta Sensoready Pen?” at the end of these instructions for use.
HOW SHOULD I STORE KESIMPTA?
- Store the pen carton in a refrigerator between 2°C and 8°C.
- Keep the pen in the original carton until ready to use to protect from light.
- Do not freeze the pen.
Keep Kesimpta out of the sight and reach of children.
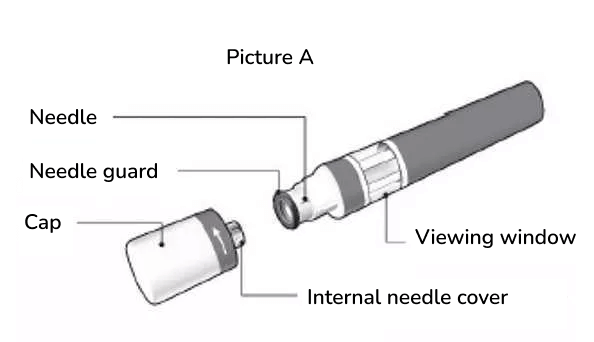
KESIMPTA SENSOREADY PEN PARTS (see Picture A):
The Kesimpta Sensoready Pen is shown with the cap removed. Do not remove the cap until you are ready to inject.
WHAT YOU NEED FOR YOUR INJECTION:
Included in the carton:
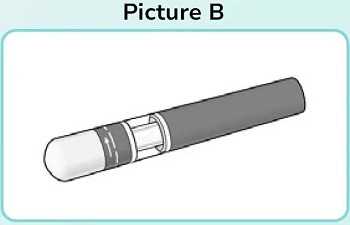
- A new Kesimpta Sensoready Pen (see Picture B)
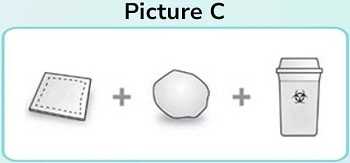
Not included in the carton (see Picture C):
- 1 alcohol wipe
- 1 cotton ball or gauze
- Sharps disposal container
See “How should I dispose of the used Kesimpta Sensoready Pen?” at the end of these Instructions for Use.
BEFORE YOUR INJECTION:
Take the pen out of the refrigerator 15 to 30 minutes before injecting to allow it to reach room temperature.
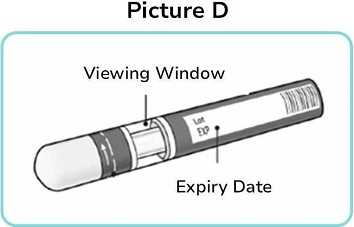
Step 1. Important safety checks before you inject (see Picture D):
- Look through the viewing window. The liquid should be clear to slightly opalescent.
Do not use if the liquid contains visible particles or is cloudy.
You may see a small air bubble, which is normal. - Look at the expiry date (EXP) on your pen.
Do not use your pen if the expiry date has passed.
Contact your pharmacist or healthcare professional if your pen fails any of these checks.
Step 2. Choose your injection site:
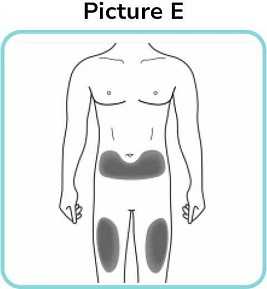
- The recommended site is the front of the thighs. You may also use the lower stomach area (lower abdomen), but not the area 5 cm around your navel (belly button)
(see Picture E). - Choose a different site each time you inject Kesimpta.
- Do not inject into areas where the skin is tender, bruised, red, scaly or hard. Avoid areas with scars or stretch marks or infection sites.
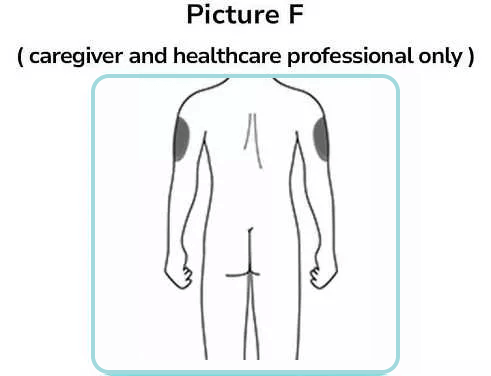
- If a caregiver or healthcare professional is giving you your injection, they may also inject into your upper outer arm (see Picture F).
Step 3. Clean your injection site:
- Wash your hands with soap and water.
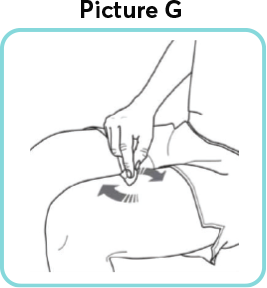
- Using a circular motion, clean the injection site with the alcohol wipe. Leave it to dry before injecting
(see Picture G). - Do not touch the cleaned area again before injecting.
YOUR INJECTION
Step 4. Remove the cap:
- Only remove the cap when you are ready to use the pen.
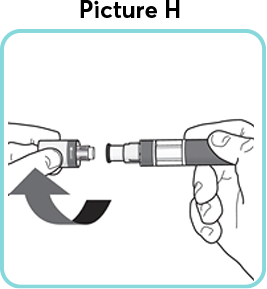
- Twist off the cap in the direction of the arrow
(see Picture H). - Throw away the cap. Do not try to re-attach the cap.
- Use the pen within 5 minutes of removing the cap.
You may see a few drops of medicine come out of the needle. This is normal.
Step 5. Hold your pen:
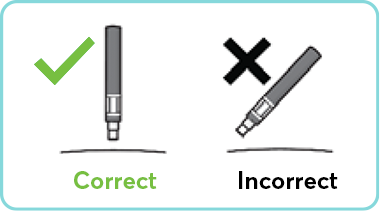
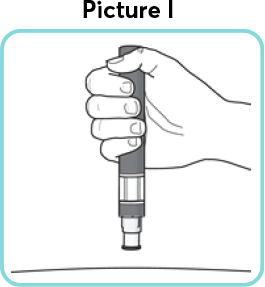
- Hold the pen at 90 degrees to the cleaned injection site (see Picture I).

Important: During the injection you will hear 2 loud clicks:
- The first click indicates that the injection has started.
- The second click indicates that the injection is almost complete.
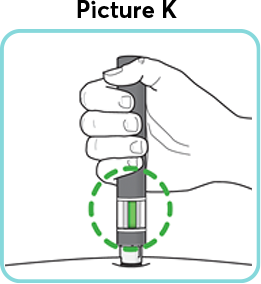
You must keep holding the pen firmly against your skin until the green indicator fills the window and stops moving.

Step 6. Start your injection:
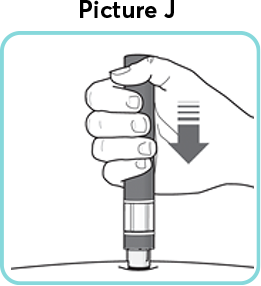
- Press the pen firmly against your skin to start the injection (see Picture J).
- The first click indicates that the injection has started.
- Keep holding the pen firmly against your skin.
- The green indicator shows the progress of the injection.
Step 7. Complete your injection:
- Listen for the second click. This indicates that the injection is almost complete.
- Check if the green indicator fills the window and has stopped moving (see Picture K).
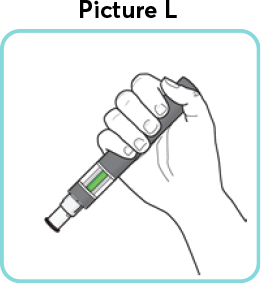
- You can now remove the pen (see Picture L).
AFTER YOUR INJECTION:
- If the green indicator does not fill the window, this means you have not received the full dose. Contact your doctor or pharmacist if the green indicator is not visible.
- There may be a small amount of blood at the injection site. You can press a cotton ball or gauze over the injection site and hold it for 10 seconds. Do not rub the injection site. You may cover the injection site with a small adhesive plaster, if the bleeding continues.
HOW SHOULD I DISPOSE OF THE USED KESIMPTA SENSOREADY PEN?
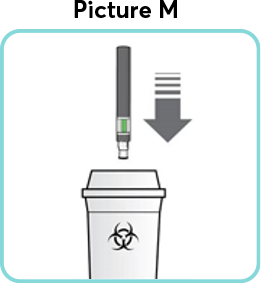
Step 8. Dispose of your Kesimpta Sensoready Pen:
- Dispose of the used pen in a sharps disposal container (i.e. a puncture‑resistant closable container, or similar)
(see Picture M). - Never try to re-use your pen.
Keep the sharps container out of the reach of children.
